 My activity
Basic principles
Configuring the My activity page is a necessary first step to usingTourSolver. Once these settings have been defined, they will be applied to all your simulations:
Additionally, you can consult the dedicated Help articles for managing sites or depots and managing forbidden transit areas on the My activity page.
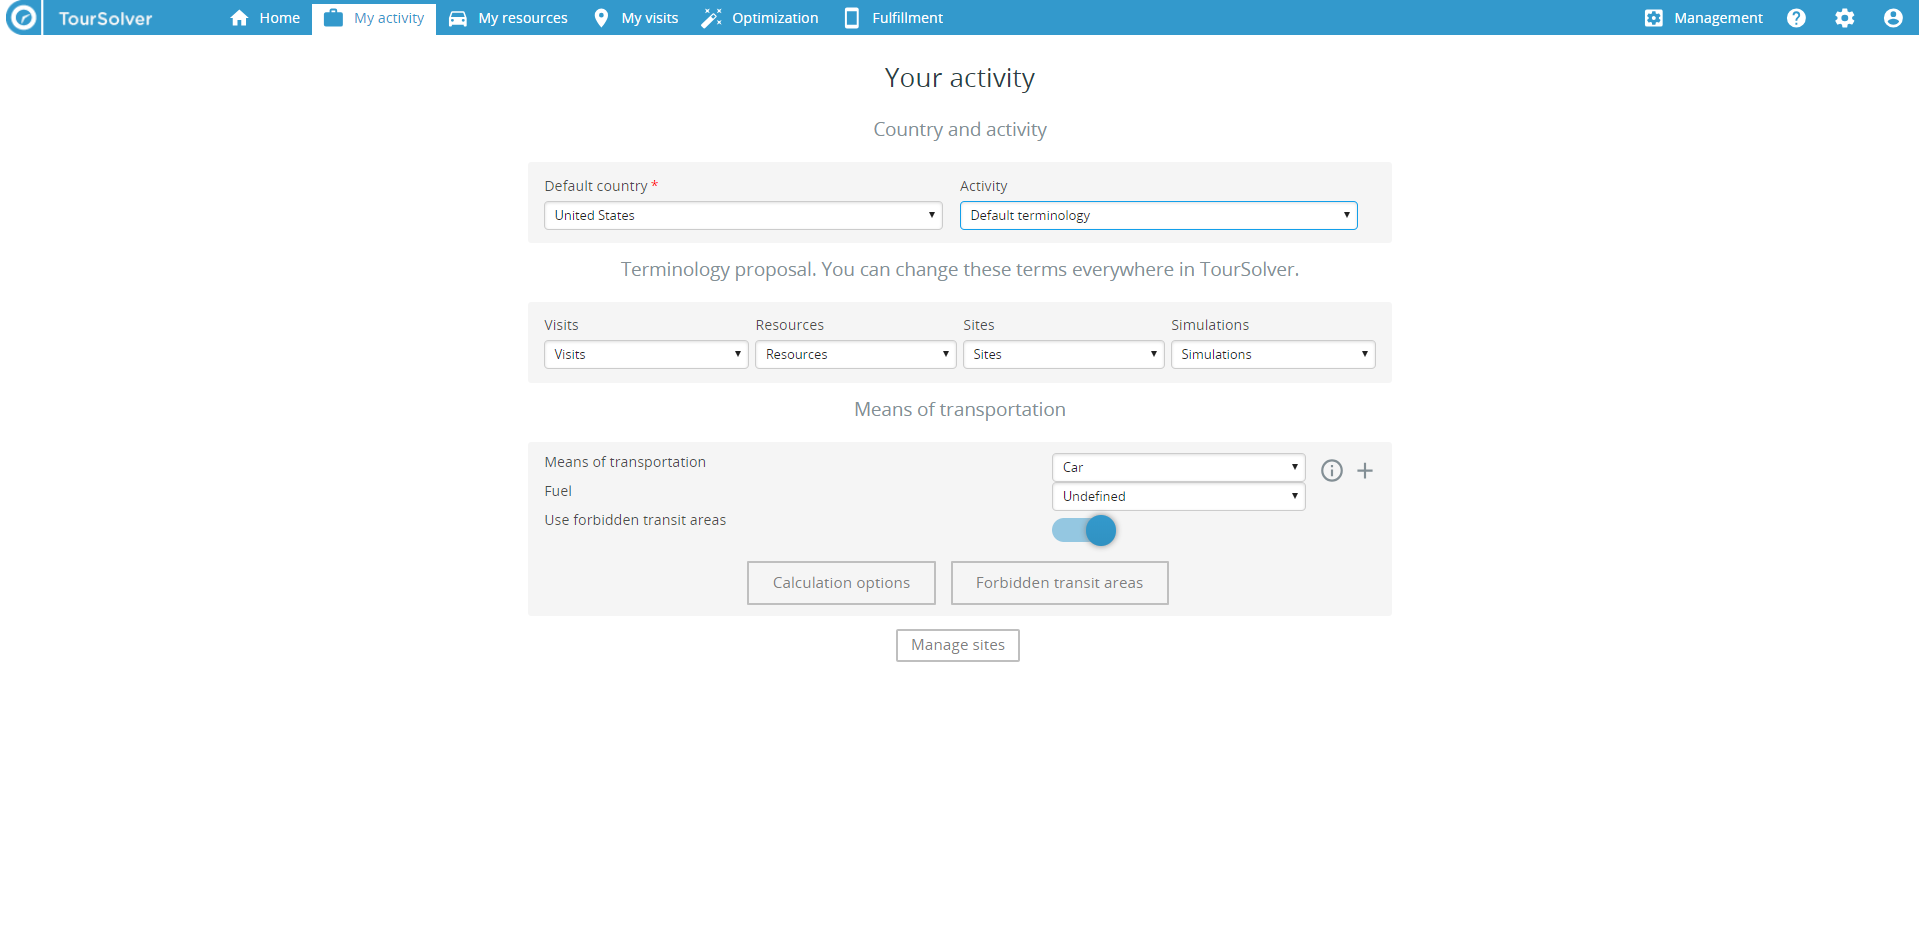
In this page, you describe your business activity, and notably:
- Define a Default country
- Select or modify the Activity to apply a default vocabulary
- Customise the vocabulary used in the interface
- Choose the Means of transportation and Fuel type used by default to set up your route
- Define a personalized vehicle profile
- Define your Calculation preferences
- Create and configure forbidden transit areas
- Create and configure sites or depots
 You MUST complete this My activity step when you first use TourSolver. The parameters defined in this tab are enduring and common to all the simulations you create or reload subsequently.
Utilisation
Default country
Choice of a Default country is mandatory to ensure your resources and visits are corretly geolocated, and to optimize your routes. Refer to the TourSolver functionalities page to find out about current and future geographic coverage.
Activity and default vocabulary or terminology
When you choose an activity, you select, in effect, a default terminology that defines key words designated for terminology used everywhere in the application:
- your resources (delivery or technical staff, sales personnel...)
- your visits (deliveries, customers, appointments...)
- your sites (depots, branch offices, agencies...)
- your simulations (routing plans)
By default, the Activity drop-down list indicates the activity you have defined when creating your TourSolver account. If you did not specify the activity when creating your account, a default terminology is offered here.
Selecting or modifying an activity automatically changes the customisable terms applied as described below.
Customising vocabulary used in the application
When you choose an activity in the list, a suitable terminology is applied everywhere in the application for naming your resources, visits, sites, and simulations. However, you can customise this terminology by choosing here any other terms you want to use instead of those applied automatically. Select the term you prefer in the list, and it will then be applied everywhere in TourSolver.
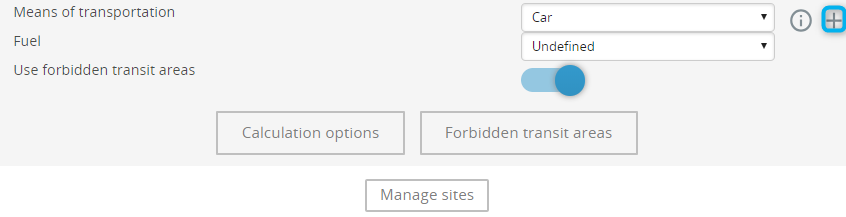
Means of transportation
Choice of a transport mode is possible at this stage. This will have an effect on average speeds and characteristics of accessibility to different types of routes applied subsequently during itinerary calculations in TourSolver. Choose the transport mode that best corresponds to your fleet. 13 transport modes are available (trucks, bus, emergency vehicles...).
 The vehicle type "Pedestrian" is only available in certain geographic zones. It is only listed when it is available for the default country chosen in this page.
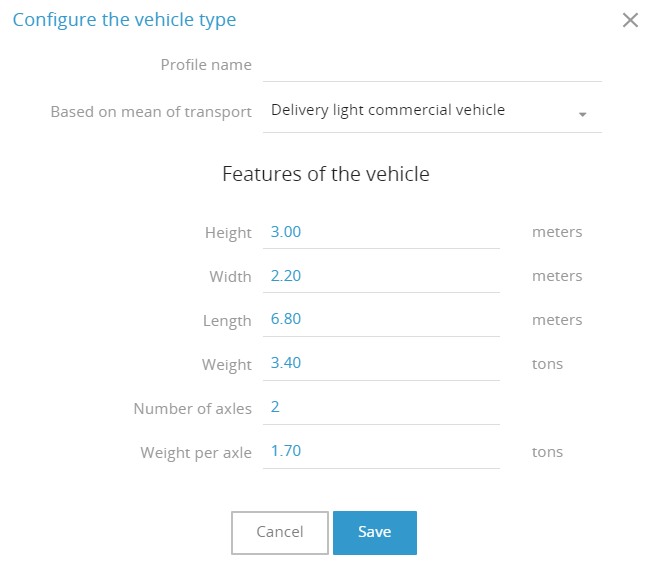
Defining a personalized vehicle profile
A dropdown list proposes a choice of vehicles and their related technical specification. These specific details can also be defined manually, for optimum control of your vehicle definition (height, width, length, weight, number of axles, weight per axle).
Calculation options
This section allows you to define preferences for route calculation at the time routes are optimized. This means you can set route calculation preferences, define speed profiles and a maximum optimization duration in minutes in order to limit the waiting time when the optimization is in progress.
Click on the Options button to open the Calculation preferences page containing three tabs:
Routes
The Routes tab defines your preferences for calculating routes between the different locations on your route:
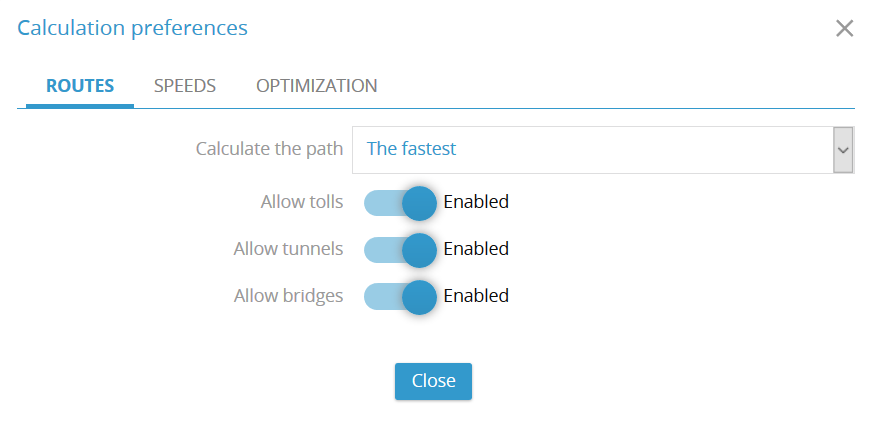
Once preferences have been defined, you can:
- Calculate the fastest route (by default) or the shortest route between locations to be visited
- Authorize, or not, use of toll roads
- Authorize, or not, passage via tunnels
- Authorize, or not, passage via bridges
Speeds
The Speeds tab is only available in the Premium version of the application. Your sales contact or dealer will be able to provide more information on this point.
The Speeds tab suggests defining the speeds as a function of the time windows defined so traffic conditions are taken into account as far as possible. A default speed profile is defined, and may be duplicated and modified to adapt the application’s calculations to each activity.
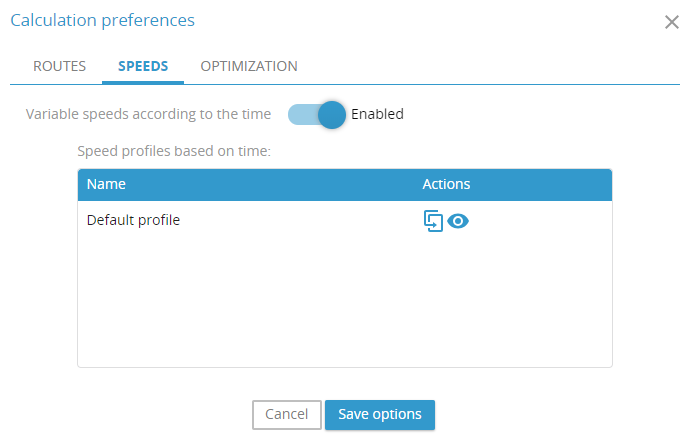
This page allows you to:
- Activate speed profiles that vary according to the time of day
- View the defined speed profiles, or those suggested by default
- Duplicate the default profile so it can be modified and adapted specifically for the business activity concerned
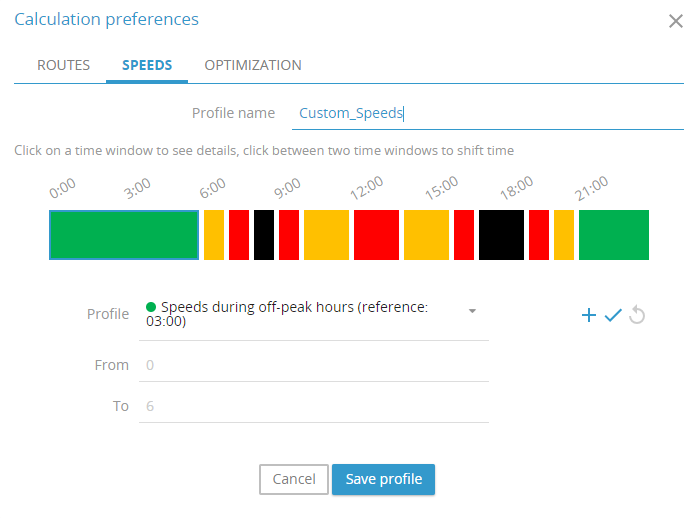
Colour coding is used to denote applicable time windows and speeds:
- Green: speeds during off-peak hours (reference time: 3h)
- Orange: speeds at standard times (reference time: 11h)
- Red: speeds during peak hours (reference time: 8h)
- Black: speeds at peak hours in town centres (reference time: 8h)
For a customised speed profile, you can: change the time window profile and add a new time window with a defined profile.
Each change must be validated by clicking on the checkbox beside the "Profile" for it to be viewed and applied.
Optimization
The Optimization tab defines a maximum duration for optimization of routes:
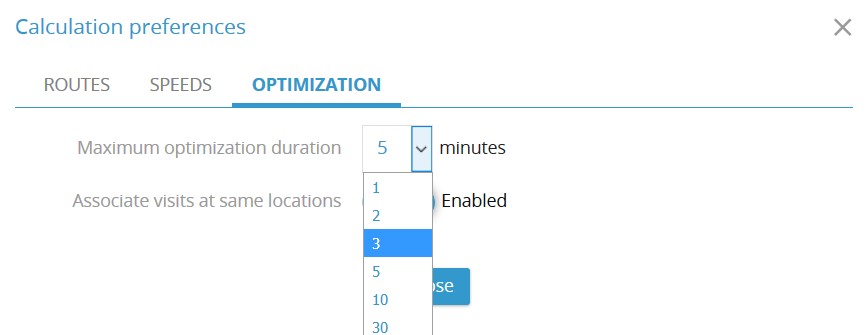
A maximum duration for optimization can be set to anywhere between 1 and 30 minutes.
Visit at the same location can be associated. When this option is enabled, all visits located at the same precise site location (often with a single address) will be associated, subject to compatibility of the constraints assigned to them*. When disabled, two quite separate route plans can operate so two customers can be visited at the same place independently, if the route optimization engine calculates that this solution is advantageous.
* For this association to take place, visits the following conditions must be fulfilled. They must:
- have the same geographic coordinates (same location)
- possess the same possible days with the same visiting time windows
- have the same compatibilities
- have the same "Require all skills to be compatible" constraint
- if the "Assign resources" constraint is used, this constraint must also have the same values.
If quantities are used, a visit with a quantity of = 0 will not be aggregated with visits having non-zero quantities.
Managing sites
Click on the link below to see the article about Managing sites or depots from the My activity page.
Manage users
The Manage Users button is only available in the Premium version. For more information, please contact your reseller.
Click on the link below to view the help article dedicated to creating and setting up users on the My Activity page.
Manage organizations
The Manage Organizations button is only available in the Premium version. For more information, please contact your reseller.
Click on the link below to view the help article dedicated to creating and setting up organizations on the My Activity page.
Validation
When TourSolver is used for the first time, the button saves the parameters and automatically takes you to the next step.
You can then alter the page subsequently at any time and then the modifications you make so they are applied to the whole of the application, without visiting any of the other pages.
The arrow icon at the top left of the page takes you back to the My Activity page.
Happy TourSolving!
> NEXT ARTICLE: My resources page