![]()
Handling forbidden transit areas
Basic principles
Adding forbidden transit areas* allows handling of accessibility specificities for certain geographic areas (Saturday street markets, road works…) and create alternative routes to navigate the current reality of the terrain (ground truth in terms of evolving road conditions or access).
![]()
 * Available in the PREMIUM version of TourSolver. Contact GEOCONCEPT SAS or your usual sales team for more information.
Utilization
Activate forbidden transit areas
Activating and configuring forbidden transit areas takes place in the My Activity page.
![]()
To use transit areas, you will need to enable the Use forbidden transit areas option.
The ![]() button takes the user into the interface for managing forbidden transit areas.
button takes the user into the interface for managing forbidden transit areas.
Managing forbidden transit areas
Creating the areas
![]()
-
In the Create and test tab select the
 button and draw the forbidden transit area on the map by clicking to define its outline. Once the area has been fully drawn, double-click on it to validate its creation.
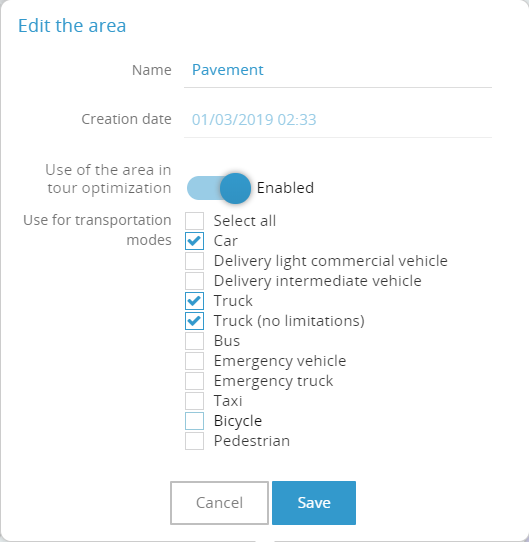
On creation of the area, a window will open allowing you to name the transit area and specify the transportation modes that are denied entry. Clearly, if access is affected by a reduced road width rather than a total blockage, pedestrians or cyclists will not be affected in the same way as a lorry.
-
Modify the outline of a forbidden transit area by clicking on the
 edit button and then select the area to edit in the map. The points making up the envelope of the area can then be moved as required.
 -
Delete a transit area: click on the
 delete icon then select the area to delete on the map, and validate.
Test an itinerary on the areas
![]()
When a forbidden transit area is defined, you can simulate a by-pass route to assess the impact on the route and the way the software behaves. To create an itinerary illustrating the correct functioning of a forbidden transit area, several tools are available:
-
Click on the
 icon to define a departure point manually by clicking in the map
 -
Click on the
 icon to define one or several stops in the simulated itinerary
 -
Click on the
 icon to define an arrival point manually by clicking on the map
 -
Select the vehicle profile used to go from the departure point to the arrival point, passing via the various stops if there are any. You can give priority to the fastest route (taking the least possible time) or the shortest route (the least possible number of kilometers). The addresses of the way points are defined under the journey type. For example, from 28 Rue de Chazelles 75017 Paris to 34 Rue de Berri, 75008 Paris.
-
The map displays the usual itinerary (without any by-pass) in blue, and superposes the substitute itinerary over it (taking the forbidden transit area into account) colored in red.
-
Comparisons of distance, duration, and CO² emissions for the two itineraries are displayed in the left-hand window of the interface.
-
Click on the
 icon to delete the test itinerary from the map.
List of zones and utilization
![]()
The List of zones tab allows the user to view all areas created, rename them, and activate or de-activate them (to handle seasonal variations or markets taking place on Wednesdays only, for example) or again to delete them definitively (for example, once road works have been completed…).
Utilization of forbidden transit areas can be over-defined on running a route optimization. Only those areas for which utilization has been activated in the List of zones will be taken into account. The forbidden transit areas can be displayed in the Optimization result map for a better understanding of the itineraries proposed.
![]()
![]()
Happy TourSolving!